Managing diabetes can feel overwhelming, especially with all the tools and technologies out there. One of the most essential tools for diabetics is the sugar test unit. This handy device helps you keep track of your blood sugar levels, which is crucial for maintaining your health. In this guide, we’ll break down everything you need to know about sugar test units, from how they work to how to use them effectively in your daily routine.
Key Takeaways
- A sugar test unit is essential for monitoring blood glucose levels.
- Regular testing helps you understand your blood sugar patterns and make informed decisions.
- Using your sugar test unit correctly can prevent mistakes and ensure accurate readings.
- Tracking your results over time allows you to identify trends and adjust your management plan accordingly.
- Staying consistent with testing can empower you to take charge of your health.
Getting To Know Your Sugar Test Unit
What Is a Sugar Test Unit?
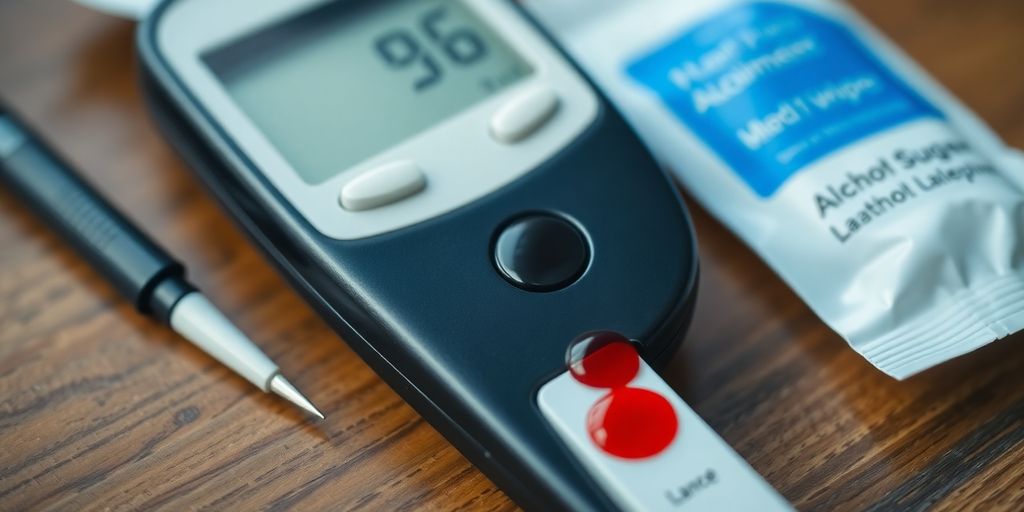
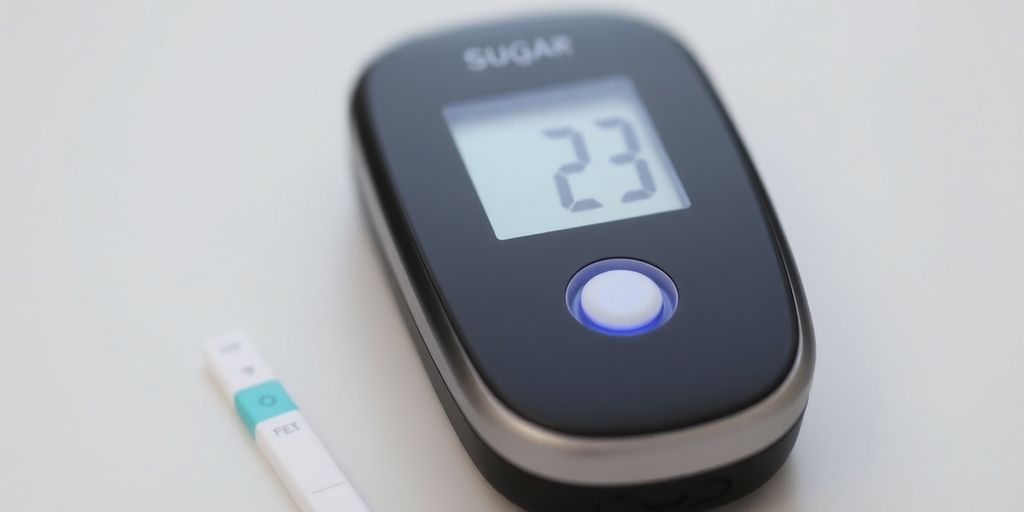
Okay, so what exactly is a sugar test unit? Simply put, it's a small, portable device that measures the amount of glucose in your blood. You might also hear it called a blood glucose meter. These units are super important for anyone managing diabetes, as they provide real-time information about your blood sugar levels. It's like having a mini-lab right at your fingertips! Knowing your levels helps you make informed decisions about diet, exercise, and medication.
How Does It Work?
The process is pretty straightforward. You start by pricking your finger with a lancet to get a tiny drop of blood. Then, you apply that drop to a test strip, which you insert into the meter. The meter then reads the strip and displays your blood sugar level. The Guide Me meter offers a user-friendly experience. It's all based on a chemical reaction between the glucose in your blood and the chemicals on the test strip. The meter measures the electrical current produced by this reaction and converts it into a blood sugar reading. Pretty neat, huh?
Types of Sugar Test Units
You've got a few options when it comes to sugar test units. Here's a quick rundown:
- Standard Blood Glucose Meters: These are the most common type. They're reliable, affordable, and easy to use. They require a finger prick for each test.
- Continuous Glucose Monitors (CGMs): These devices continuously monitor your blood sugar levels throughout the day and night. A small sensor is inserted under your skin, and it sends readings to a receiver or smartphone. No more constant finger pricks!
- Blood glucose meter with Bluetooth: Some meters come with Bluetooth connectivity, allowing you to automatically sync your readings to a smartphone app or computer. This makes it easier to track your trends and share data with your healthcare provider.
Choosing the right unit depends on your individual needs and preferences. Talk to your doctor or diabetes educator to figure out which one is best for you. They can help you understand the pros and cons of each type and find a unit that fits your lifestyle.
Why Regular Testing Matters
Understanding Blood Sugar Levels
Okay, so, blood sugar levels. What's the big deal? Well, they're basically the amount of glucose floating around in your blood. Think of glucose as fuel for your body's cells. You get it from food, especially carbs. When things are working right, your body releases insulin to help that glucose get into your cells. But when you have diabetes, that system is kinda broken. That's why understanding where your blood sugar is at any given time is super important. It's like knowing how much gas is in your car – you need to know if you can make it to your destination!
The Importance of Monitoring
Why bother checking your blood sugar all the time? Because it gives you power! Regular monitoring is like having a personal weather forecast for your body. It lets you see how different foods, activities, and even stress affect your levels. This info helps you make smart choices about what you eat, when you exercise, and if you need to adjust your medication. Plus, catching highs and lows early can prevent some serious health problems down the road. Think of it as preventative maintenance for your body – a little effort now can save you a lot of trouble later.
How Testing Can Empower You
Testing isn't just about numbers; it's about taking charge of your health. When you know your blood sugar levels, you can:
- Make informed decisions about your diet.
- Adjust your exercise routine for optimal results.
- Work with your doctor to fine-tune your medication.
- Identify patterns and triggers that affect your blood sugar.
- Feel more confident and in control of your diabetes.
It's easy to feel overwhelmed by diabetes, but remember, knowledge is power. Each test is a chance to learn something new about your body and how it responds to different things. Don't be afraid to experiment (safely!) and find what works best for you. Regular medical check-ups are also important.
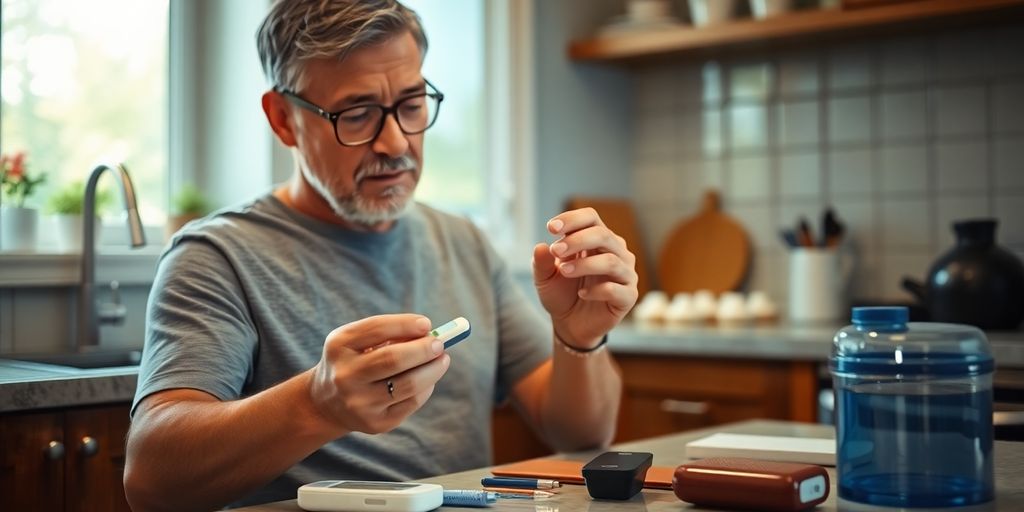
How To Use Your Sugar Test Unit Effectively
Step-by-Step Guide to Testing
Alright, let's get down to the nitty-gritty of using your sugar test unit. It might seem a little intimidating at first, but trust me, after a few tries, it'll become second nature. Think of it like learning to ride a bike – a little wobbly at first, but soon you'll be cruising!
Here's a simple step-by-step guide:
- Gather Your Supplies: You'll need your meter, a test strip, a lancet device, and an alcohol swab. Make sure everything is within reach before you start.
- Wash Your Hands: Clean hands are crucial to avoid inaccurate readings. Use warm water and soap, then dry thoroughly.
- Prepare the Lancing Device: Insert a new lancet into the lancing device. Adjust the depth setting according to your comfort level. Some people prefer a shallower prick, while others need a bit more.
- Insert the Test Strip: Insert the test strip into your meter. The meter should turn on automatically, or you might need to press a button. Wait for the meter to display a signal that it's ready.
- Prick Your Finger: Use the lancing device on the side of your fingertip. The sides are generally less sensitive than the pad of your finger.
- Apply Blood to the Test Strip: Gently squeeze your finger to get a small drop of blood. Touch the drop to the designated area on the test strip. The meter will usually beep or display a symbol to indicate it has enough blood.
- Wait for the Reading: The meter will display your blood sugar level within seconds. Record the reading in your logbook or app.
- Dispose of the Lancet Safely: Use a sharps container to dispose of used lancets properly. Never reuse lancets.
Common Mistakes to Avoid
We all make mistakes, especially when we're learning something new. But knowing the common pitfalls can help you steer clear of them. Here are a few to watch out for:
- Using Expired Test Strips: Always check the expiration date on your test strips. Expired strips can give inaccurate readings.
- Not Enough Blood: If you don't get enough blood on the test strip, the meter might display an error message. Don't force it; use a new test strip and try again.
- Dirty Hands: As mentioned earlier, clean hands are essential. Food residue or other substances on your fingers can skew the results.
- Incorrect Meter Settings: Make sure your meter is set to the correct date and time. This is important for tracking trends over time.
- Storing Supplies Improperly: Keep your test strips and meter in a cool, dry place. Extreme temperatures and humidity can affect their accuracy.
Tips for Accurate Readings
Okay, so you know the steps and the mistakes to avoid. Now, let's talk about some extra tips to ensure you're getting the most accurate readings possible. After all, accurate data is what helps you manage your blood sugar effectively.
- Stay Hydrated: Dehydration can affect your blood sugar levels. Make sure you're drinking enough water throughout the day.
- Use the Side of Your Fingertip: As mentioned before, the sides of your fingertips are less sensitive and provide a better blood sample.
- Don't Squeeze Too Hard: Squeezing your finger too hard can dilute the blood sample with tissue fluid, leading to inaccurate results.
- Calibrate Your Meter: Some meters require calibration. Follow the manufacturer's instructions to calibrate your meter regularly.
- Control Solution: Use a control solution periodically to ensure your meter and test strips are working correctly. This is especially important if you suspect your readings are off.
Remember, consistency is key. Testing at the same time each day and under similar conditions will give you the most reliable data. And don't be afraid to reach out to your healthcare provider if you have any questions or concerns. They're there to help!
And that's it! You're now equipped with the knowledge to use your sugar test unit effectively. Happy testing, and here's to staying healthy and informed! If you are looking for a glucose monitor, make sure to do your research.
Interpreting Your Results
What Do Your Numbers Mean?
Okay, so you've got your numbers. Now what? Don't panic! Think of your blood sugar readings as clues, not verdicts. They're giving you information about how your body is handling sugar at a specific moment. Understanding what's considered a normal range is the first step.
Here's a general idea, but remember, your doctor will set personalized targets for you:
- Fasting (before breakfast): Generally, 70-100 mg/dL is considered normal for people without diabetes.
- Before meals: Similar to fasting, aim for 70-100 mg/dL.
- 1-2 hours after meals: Less than 140 mg/dL is usually the target.
It's important to remember that these are just guidelines. Several factors can influence your blood sugar, including stress, illness, and even the time of day. That's why consistent monitoring and discussion with your healthcare provider are so important.
When to Seek Help
Knowing when to reach out to your doctor is just as important as understanding your numbers. Don't hesitate to call if:
- You consistently have readings outside your target range.
- You experience symptoms of hyperglycemia (high blood sugar) or hypoglycemia (low blood sugar), even if your meter readings seem normal.
- You're feeling unwell and suspect it might be related to your blood sugar.
- You have questions or concerns about your readings or your diabetes management plan.
It's always better to be safe than sorry. Your healthcare team is there to support you, so don't be afraid to ask for help. Remember to check out a blood sugar chart for more information.
Understanding Trends Over Time
One-off readings are useful, but the real power comes from seeing trends over time. Are your numbers consistently high after lunch? Do they tend to dip low in the late afternoon? Keeping a log of your readings, along with notes about your meals, activity levels, and any medications you're taking, can help you identify patterns and make adjustments to your routine.
Think of it like this:
- Track your readings: Use a notebook, a spreadsheet, or a diabetes management app.
- Note the context: What did you eat? What were you doing? How were you feeling?
- Look for patterns: Are there specific times of day or situations that consistently affect your blood sugar?
By understanding these trends, you can work with your doctor to fine-tune your diabetes management plan and achieve better control. It's all about becoming an active participant in your own health!
Incorporating Testing Into Your Routine
Okay, so you've got your sugar test unit, you know how to use it, and you understand what the results mean. Now, let's talk about making testing a regular part of your life. It might seem like a chore at first, but trust me, it gets easier, and the peace of mind it brings is totally worth it. Think of it as a superpower – the ability to see what's going on inside your body and make informed decisions.
Creating a Testing Schedule
Figuring out when to test can feel a bit overwhelming, but it doesn't have to be! The best approach is to chat with your doctor or diabetes educator. They can help you create a schedule that fits your specific needs and lifestyle.
Here are some common times people test:
- First thing in the morning: This gives you a baseline reading before you've eaten anything.
- Before meals: Helps you understand where you're starting from before you eat.
- Two hours after meals: This shows you how your body responds to the food you just ate. This is similar to a glucose tolerance test during pregnancy.
- Before bed: Ensures you're in a safe range overnight.
Consistency is key. Try to test at the same times each day, or on the days you've scheduled. Set reminders on your phone if that helps!
Balancing Diet and Testing
Testing and diet go hand-in-hand. Your blood sugar readings can give you valuable insights into how different foods affect you. For example, you might notice that a certain type of carbohydrate causes a bigger spike than others.
Keep a food diary alongside your testing results. Note what you ate, how much you ate, and your blood sugar levels before and after. Over time, you'll start to see patterns and understand what works best for your body. It's all about finding that sweet spot (pun intended!) where you can enjoy your food and maintain stable blood sugar levels. Remember to avoid sugary drinks and snacks for better blood sugar control.
Staying Motivated to Test
Let's be real, sticking to a testing routine can be tough. Life gets busy, and sometimes you just don't feel like pricking your finger. But don't give up! Here are a few tips to stay motivated:
- Celebrate small victories: Did you stick to your testing schedule for a week? Treat yourself to something non-food related, like a new book or a relaxing bath.
- Find an accountability partner: Connect with a friend or family member who also has diabetes, or join an online support group. Sharing your experiences and challenges can make a big difference.
- Remember your why: Keep in mind the reasons why you're testing in the first place. Maybe it's to prevent complications, feel more energetic, or live a longer, healthier life. Write down your goals and look at them whenever you need a boost.
Think of testing as an act of self-care. You're taking control of your health and making informed decisions that will benefit you in the long run. It's not always easy, but it's always worth it.
The most important thing is to be kind to yourself. If you miss a test, don't beat yourself up about it. Just get back on track with the next one. You've got this!
Troubleshooting Common Issues
Let's face it, even the best sugar test units can sometimes throw a curveball. Don't worry, though! Most issues are easily fixable with a little know-how. We're here to help you get back on track and ensure your readings are as accurate as possible. It's all about understanding what can go wrong and how to troubleshoot it effectively. Let's get started!
Dealing with Inaccurate Readings
Okay, so you've got a reading that just doesn't seem right. Maybe it's way higher or lower than you expected, or maybe it's inconsistent with how you feel. First things first, don't panic! Inaccurate readings are a common issue, but they can usually be resolved.
Here's a checklist to run through:
- Check the Expiration Date: Make sure your test strips haven't expired. Expired strips can give unreliable results.
- Proper Storage: Were your strips stored in a cool, dry place? Heat and humidity can mess with their accuracy.
- Cleanliness is Key: Ensure your hands are clean and dry before testing. Any residue (food, lotion, etc.) can affect the reading.
- Sufficient Blood Sample: Did you get enough blood on the test strip? Not enough blood is a frequent culprit.
If you've checked all of these and you're still getting weird readings, try comparing your unit's results with a lab test. If you have type 2 diabetes, it's important to ensure your readings are accurate.
Maintaining Your Sugar Test Unit
Think of your sugar test unit like your car – it needs regular maintenance to keep it running smoothly! A little TLC can go a long way in ensuring accurate and reliable results for years to come. Regular maintenance is key.
Here's what you should be doing:
- Cleaning: Wipe down your unit regularly with a soft, slightly damp cloth. Avoid getting moisture in the test strip port.
- Calibration: Some units require calibration. Check your user manual for instructions on how to do this. Calibration solutions are usually available from the manufacturer.
- Battery Check: Make sure your unit has fresh batteries. Low batteries can lead to inaccurate readings or unit malfunction.
- Storage: Store your unit in a case or pouch to protect it from dust and damage.
Keeping your sugar test unit in good condition not only ensures accurate readings but also extends its lifespan. A well-maintained unit is a reliable unit!
When to Replace Your Unit
Even with the best care, sugar test units don't last forever. Knowing when to replace your unit is important for maintaining accurate blood sugar monitoring. It's time to consider a replacement if:
- Frequent Malfunctions: If your unit is constantly giving error messages or malfunctioning, it's probably time to retire it.
- Physical Damage: If your unit has been dropped or damaged, it may not be accurate anymore.
- Age: Most units have a lifespan of around 3-5 years. Check your user manual for the manufacturer's recommendation.
- Inconsistent Readings: If you've tried troubleshooting and your readings are still consistently inaccurate, it's best to get a new unit.
Don't wait until your unit completely fails! Replacing it proactively ensures you always have access to reliable blood sugar readings. Plus, newer models often come with improved features and accuracy, so it's a win-win!
The Future of Sugar Testing Technology
It's an exciting time for diabetes management! The technology surrounding sugar testing is evolving quickly, making it easier and more convenient than ever to stay on top of your blood sugar levels. Let's take a peek at what the future holds.
Innovations in Sugar Test Units
We're seeing some really cool advancements in how sugar test units work. For example, there's a lot of research going into non-invasive testing methods. Imagine a world without finger pricks! Scientists are exploring ways to measure glucose through the skin using light or other sensors. It's still in the early stages, but the potential is huge. Plus, existing meters are getting smarter, with better accuracy and more features.
Wearable Technology
Wearable tech is already making a big splash, and it's only going to get bigger. CGM systems are becoming more common, and they're getting smaller and more discreet. These devices continuously monitor your glucose levels and send the data to your phone or another device.
Here's what's great about them:
- Real-time data: See your glucose levels right now, not just when you test.
- Trends: Understand how your levels are changing over time.
- Alerts: Get notified when your glucose is too high or too low.
The integration of wearable tech with other health devices is also on the horizon. Think about your sugar test unit talking to your insulin pump, automatically adjusting your dosage based on your glucose levels. It's all about creating a closed-loop system for better control.
The Role of Apps in Monitoring
Apps are becoming an integral part of diabetes management. They can do so much more than just record your blood sugar readings. Many apps now offer features like:
- Food logging: Track what you eat and see how it affects your glucose.
- Medication reminders: Never forget to take your insulin or other meds.
- Exercise tracking: See how physical activity impacts your levels.
And it's not just about tracking. Apps are also getting smarter, using data analysis to provide personalized insights and recommendations. They can help you identify patterns, adjust your diet or medication, and even connect with your healthcare team for remote monitoring. It's like having a diabetes coach in your pocket!
Wrapping It Up
So there you have it! Understanding the sugar test unit doesn’t have to be a headache. With the right tools and a little know-how, you can keep your blood sugar levels in check and feel great. Remember, it’s all about finding what works for you and making those small changes that can lead to big results. Whether it’s adjusting your diet, staying active, or just keeping an eye on those numbers, you’ve got this! Here’s to a healthier, happier you!
Frequently Asked Questions
What is a sugar test unit?
A sugar test unit is a device that measures the amount of sugar (glucose) in your blood. It's important for people with diabetes to keep track of their blood sugar levels.
How do I use a sugar test unit?
To use a sugar test unit, you usually prick your finger to get a drop of blood, place it on a test strip, and insert the strip into the device. The unit will then show your blood sugar level.
Why is regular blood sugar testing important?
Regular testing helps you understand how your body responds to food, exercise, and medication. It can help prevent serious health issues related to diabetes.
What should I do if my blood sugar reading is too high?
If your blood sugar is too high, you should follow your doctor's advice. This may include taking medication, drinking water, or exercising, depending on your situation.
How can I ensure my sugar test unit gives accurate readings?
To get accurate readings, always use fresh test strips, keep your unit clean, and follow the manufacturer's instructions carefully.
What should I do if my sugar test unit is not working properly?
If your unit is not working, check the batteries, ensure it's clean, and refer to the user manual for troubleshooting tips. If problems persist, consider contacting customer support.